Getting Started with Deno: Setup and Hello World Program

Deno presents a new way to write server-side JavaScript and TypeScript. Since it uses the V8 JS engine and is built in Rust, it is extremely fast. Although it is still in the development phase, most developers have heralded it as the ‘Programming Language of the Future’. It is expected that within five to six years, more companies would migrate from Node.js to Deno.js (successor to Node.js).
Now you may ask why? Well, Deno.js has a number of advantages. It is extremely secure, and developers have to grant permission for execution of a task. Furthermore, Deno.js has a simplified module system, no package.json, decentralized packages, top-level await, browser-compatible codes, just to name a few.
So, without further ado, let us delve into how to get started with Deno.
How to Install the Deno?
Windows users
You have to type the following command in Windows Powershell:
iwr https://deno.land/install.ps1-useb | iex
macOS and Linux users
You have to type in the macOS and Linux Shell:
curl -fsSL https://deno.land/install.sh | sh
Mac users
If you are using Homebrew in Mac, then you will have to type:
irm https://deno.land/install.ps1 | iex
Since I’m using a Windows system, I’ll use the first code. Here is the consequence/output

How to Ensure that Deno is Installed in the System?
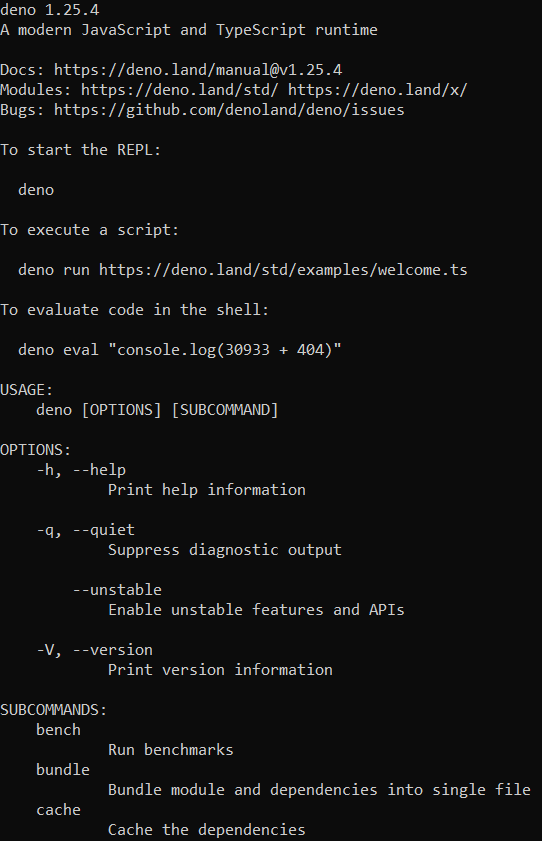
Next, you have to be sure that Deno.js has been successfully installed in the system. For this, you have to go to Command Prompt, or you can carry out this function in the Windows Powershell itself.
(Note: If you are macOS or Linux user, you have to use the Terminal or the Shell)
All you have to do is:
deno - -help
Once you type this, you will get to see: how to start the REPL, execute a script, evaluate a code in the shell, USAGE, OPTIONS, SUBCOMMANDS, and ENVIRONMENT VARIABLES.

Thus, you get a confirmation that the Deno.js has been successfully installed in the system.
How to Create a Directory to Start Programming in Deno?
If you wish to save all the projects in a safe place, your best bet would be to go for deno-workspace. Again, in order to create the directory, you can use the Command Prompt or Powershell (in WIndows).
I have VS Code opened for the execution of the program, so I’ll type in the Powershell
cd deno-workspace
mkdir hello
cd hello
codeA new VS Code window opens. We create a source file named ‘hello.ts’ which means we will be writing in TypeScript. And we create the file inside the ‘hello’ directory that we created.
How to Write a ‘Hello World’ Program in Deno?
Inside the ‘hello.ts’ file, we just have to write the following statement.
console.log (“Hello World”)
The console.log() method helps us in sending an output to the web console. Now, the message may be in the form of multiple JS objects or as simple as one line string.
And if we run the program in the Terminal of VS Code by typing deno run hello.ts, we get the output:

How to Write the ‘Hello World’ Program by Using the Command in the Official Deno Page?
You can visit the page https://examples.deno.land/hello-world. And you will see that you can run the program locally taking the help of the Deno CLI.
You can either open Terminal of VS Code (or Powershell) or Command Prompt. And paste this command.
deno run https://examples.deno.land/hello-world.ts
You will see the following output:

Hopefully, you were able to understand how you can setup Deno.js and run a simple program like ‘Hello World’. Keep following the tutorial blog series in order to gain an insight into the relatively new language and achieve proficiency in it.

I have been working as a content writer for four years, after I graduated in 2018 with a B.Tech in Electronics and Telecommunication. Learning about programming languages and technologies is a passion for me. Apart from programming, I like to play guitar in my leisure time.